French cuffs are one of those things that just screams classy. Seriously, it has 'French' in it's title, and they don't give that distinction to just anything. You don't get much more fancy than that. And what's neat is that they are really easy to add to a pattern by simply modifying your cuff piece and making one alteration on the way you sew them to the sleeve.
So at a glance, a French cuff, when not folded, is just one really long cuff. To make the piece, all you have to do is take your current cuff pattern piece, double it's size, and add another half centimeter to its length. Dig this for a visual reference.
That extra half centimeter is important, as when the cuff is folded, the edge must go past where the cuff is sewn on to the sleeve. That part should not be visible at all. I make my cuffs square because I like angles, but you can also do rounded cuffs, more angles, embroider dragons, etc. Sky's the limit.
You may also want to use much bigger seam allowances on the side edges, too, as when sewing a typical barrel cuff, the cuff buttons over itself, so it needs that extra cuff to overlap. A French cuff buttons to its sides, so you will have a really long part sticking out by your wrist, which can effect how the cuff will fit in a jacket. Keep in mind what you will wear this shirt with while sewing it.
Sewing them is still the same as a normal cuff. Right sides together, sew edges, etc. There is one small change that is made, though, when attaching it, which lies in the button plackets on the sleeve. Dig this, here's a picture of a normal barrel cuff, that is button by putting the cuff over itself.
Now, here's that same sleeve, but I've put the cuff together as if it was a French cuff, so they are connecting rather than being buttoned over itself.
See that fold that has developed along the top? That's the natural fold the sleeve wants to take for this cuff style, and has to be compensated for to keep the sleeve smooth. To do this, when attaching the cuff to the sleeve, fold the thinner placket towards the inside of the shirt. Just follow the natural fold on the fabric, even if it doesn't look even. Should look similar to the following picture:
See the placket now on the inside of the shirt? Now just sew the sleeve on as normal. Technically, you are losing a little bit of the sleeve doing this, making it tighter at the wrist. If your sleeve pattern is already wrist tight, adjust your patten, adding a centimeter or so to an edge.
With the cuffs attached, all that's left is to add buttonholes to the cuffs. Generally, the buttonhole length is the same length as the buttons along the front of the shirt. Use one of those buttons in your buttonhole foot on your sewing machine. The diameter is like 11mm, give or take a millimeter or two, in case you are using over-sized buttons on the front or doing something different. Also, with your arm held straight out in front of you, the buttonholes go vertical, not horizontal on the cuff, because that's where the stress will be placed on the sleeve.
There will be four buttonholes, one on each of the four layers of the folded cuffs. It's placement is completely up to you. I aim mainly for utility, which also is the traditional approach, so I place it towards the middle of the cuff. Forward mount is another common one seen, and is best if you have some cufflinks you'd really like to show off. Many off-the-rack shirts will have two button holes on the outer layer, one being behind or in front of the other so you can have more or less length at your leisure.
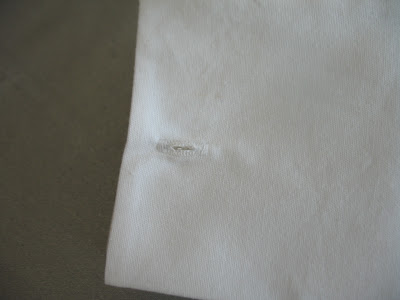
Easiest way to line up the button holes is to fold and press the cuffs exactly how you want them when worn. Then, mark where your first button hole will go, sew it, and slice it open. Fold it back to how it will be worn, and through your button hole, mark the next layer, sew it, and open it. Repeat for the remaining layers. This ensures properly lined up button holes. See the following picture, I just stick a pencil through and lightly mark the lower side. It washes out no problem.
And now, you're ready for the ball. Well, almost. Sewing the cuffs was the easy part, now comes the hard part: picking out a a pair (or twenty) of cufflinks.
-Cat
White fabric for the French cuff shirt is 100% Organic Cotton from Michael Levine in Downtown Los Angeles, also available online here.
This is my favorite fabric for white. It's incredibly soft, and has a
very similar texture and sheer to Oxford. Not too thin, yet very light.
White fabric for the barrel cuff shirt is woven cotton fabric I also picked up at Michael Levine but can't find it on the website. It's VERY sheer, I used it for an experiment in sewing a double layer shirt, which was annoying to do an came out horrible so I don't like to show it too much.


Thanks for this! Is the placket just sewn differently, or does the pattern have to be altered to make French Cuffs instead of barrel cuffs? Thanks again!
ReplyDelete